
I was surfing Reddit as I often am when I came across a guy who had posted a thread about a ring that his father had made from an American half dollar coin. I often find myself with nothing to do and this piqued my interest. After some googling I found that all pre 1965 American large coins were made from solid silver, or thereabouts, and these are easy to turn into a ring. So at that point I jumped on eBay and bought myself a Half Dollar coin, a 1958 Ben Franklin coin to be exact for £7 delivered, bargain! A bit of further searching and it would appear I could flog it to the yanks for about $40 if I could be bothered, I couldn’t, so ring making commenced.

You require very few things to make a ring from a coin, in my case a lump of steel that I would use as an anvil, a hammer, a stainless steel spoon, some various grades of wet and dry sandpaper, and some jewellers rouge. Begin to roll the ring along between two fingers on your anvil; tapping the top of the ring as you go, you soon knock away the knurled edge. Keep rolling and tapping.

The edge has started to roll over below. I shall probably get poo-poo’d for using a hammer, the decent way is to use a spoon and hours of tapping, my time is too precious to do that, so hammer it was. Keep rolling and tapping.

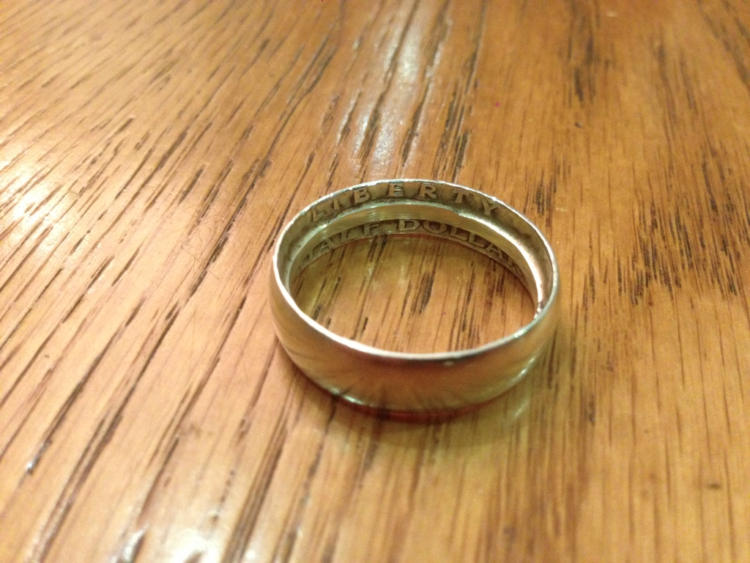
The edge has started to turn over including the lettering along the edge.


Almost there, keep going, the edges will have flat spots making it hard to roll it, keep going, and tapping them out where you can.

In this picture I’d gone far enough, started to use a spoon instead, this takes the flat spots off and starts to leave the coin with a shine. Use both sides and keep tapping. I spent several hours in front of the TV doing this by myself without the anvil; you could soon annoy a living companion making these.

So at this point I was happy that my ring was nicely edged and round, no flat spots so sat out on my balcony with the wet and dry paper, a pint glass of water and a beer on a hot sunny day and started to sand the coin. Start with a thick grade of paper, add water, then sand away, make sure that you get rid of any grooves or dings in the ring with the thick grade as you won’t get rid of them with the finer grade. Progress through the grades until you get a gorgeously smooth finish that has an almost frosted shine to it.

Almost there.

Right, time to get a hole in this thing. I found the center of the ring with a square and drilled a small pilot hole of about three mm, then progressed up to the largest drill I had. At this point I held the coin in a soft gripped jaw vice and used a dremel with a sanding bit to start sanding out the hole. This makes the coin get very hot, so take it easy when touching it. Keep going, being very careful not to sand any of the lettering that you so carefully rolled onto the inside of the band.

Almost there, persevere and you shall cut the hole big enough.

Once the hole is big and soft enough from using the sandpaper again its time to finalize the outside of the ring, I used a jeweller’s polish called jewellers rouge, a fine abrasive powder. I’d highly recommend wearing gloves as it gets everywhere and stains. Place some of the powder in your gloved fingers, add a few drops of water and then polish the outside of the ring, repeat this a few times and you’ll get a gorgeous shine on the ring!
So the final result worked out pretty well for my first attempt, albeit a tad large, I wear it daily on my left thumb.
Things I’ve learnt, hammer more so the end result isn’t so large, easy going when sanding the internal hole, as it’s easy to take the edge of the lettering. Overall quite pleased with the result! Maybe I’ll do another soon!