
A few years back I was desperate to get some stuff printed and my printer had shit the bed. So I needed a new printer asap, I did what most people do and walked into PCWorld and grabbed a cheap wifi Canon printer, in my case the MG3100 scanner/printer combo. It’s a sweet little thing, only cost me about £30, can’t go wrong, right? Well, it’d be better if it had Airprint compatability and not just use the Canon app thats a bit clunky for a quick print option.
I decided during lockdown that I should solve this, it was something that I thought about doing everytime I used the printer and knew I could do it, but I just had never gotten around to it. So sat on my arse in self isolation I sorted it and now I wish I had done it sooner.
I decided to use one of my raspberrypi boards, I have two running 24/7, currently my PiHole machine which is a Pi2B has an uptime of 82days and as it only does Pihole and OpenVPN I chose to use that. This guide is assuming you’ve got a raspberrypi up and running with a suitable OS and understand and able to use ssh. I use raspbian lite buster, I only use the lite option on any of my pi’s as I have no need for desktop, these machines are headless and sat in a cupboard never to see the light of day, all my work is done via ssh, I use the terminal on my mac but you can use putty etc if on Windows. My Pi’s are connected via ethernet directly to my router, but this will work if you use a Pi wirelessly and will work if your printer is already wifi or usb.
So with being SSH’d into your chosen machine, the first thing to do is update it, as you do with any new installations, its a good habbit to get into.
sudo apt-get update && sudo apt-get -y upgrade
You’ll be asked for your sudo password but this will execute update and upgrade in one command if update doesn’t fail.
Plug in your printer via usb if it’s usb only, if it’s wifi you can ignore this step. Type
lsusb
To make sure its connected, if it’s not showing, maybe do a reboot with sudo reboot and then try lsusb again.
If you want the printer to show wirelessly on windows machines too, then we need to install samba. Samba is primarily used for sharing your data on a linux machine to a windows network but we can also use it for sharing printers from linux to windows enviroment.
sudo apt-get install samba
Now we install Cups, this is the printer manager software.
sudo apt-get install cups
Both of these might take a minute to install as they are fairly large packages. Next we need to add your user to the group for administering the printer, note my username is puk, yours might well be pi.
sudo usermod -a -G lpadmin puk
Next we need to adjust the configuration file for cups, I use nano for editing files via ssh, if you’re hardcore then sure use vim.
sudo nano /etc/cups/cupsd.conf
There’s a few things to look for here, and this .conf file is likely to change with updates so yours might look different but I’m sure it’ll be similar. If you wish to get to the CUPS admin page from other machines on your network you need to look for:
# Only listen for connections from the local machine.
Listen localhost:631
And edit it to this:
# Only listen for connections from the local machine.
#Listen localhost:631
Port 631
So this means you’ll be able to access the admin page from any machine on your network with your PI’s ip, my example is http://192.168.0.2:631
Now scroll down and make the edits that I’ve highlighted in bold:
# Restrict access to the server...
<Location />
  Order allow,deny
  Allow @local
</Location>

# Restrict access to the admin pages...
<Location /admin>
  Order allow,deny
  Allow @local
</Location>

# Restrict access to configuration files...
<Location /admin/conf>
  AuthType Default
  Require user @SYSTEM
  Order allow,deny
  Allow @local
</Location>
This allows anyone on the network to access what you need to administer Cups, its easier than just leaving it to be edited directly on the pi imo. Restart Cups with this command:
sudo /etc/init.d/cups restart
Now you can access CUPS, as I said before, you need to know the IP of your Pi, but you should know all this as you ssh’d into it. By following http://192.168.0.2:631 in a browser you’ll be presented something like this:
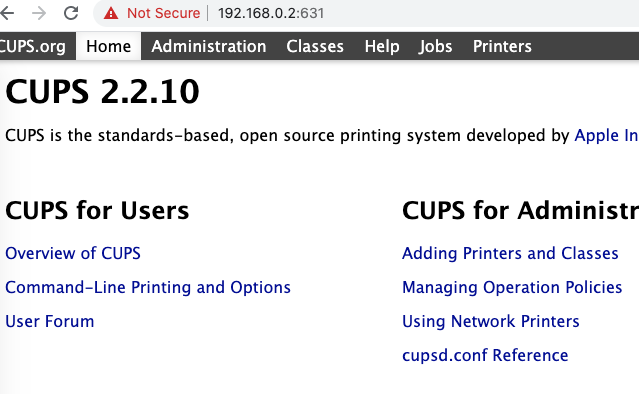
Note the Not Secure in the URL bar. Now we need to add your printer. Make sure your printer is switched on.
Click Administration tab and the Add Printer button, it’ll move you to an SSL page, just ignore the warnings and open the page, it’ll ask for your Pi username/password, type those in and hopefully it’ll find your printer for you like below, you can see my wifi printer by the discovered printer options:

Click on your printer and click Continue.

Give the printer a friendly name, a location if you want, and make sure you tick the Sharing button. Press continue.

Choose a driver, hopefully Cups knows what your printer is, you can see mine is selected. Click Add Printer. The next page is about setting any defaults, I just unticked double sided printing as it’s not ofen I want to use it:

And your printer is added!

If you want to continue to add windows support then we need to play with samba’s settings, so back to ssh type:
sudo nano /etc/samba/smb.conf
Scroll to the bottom and add this:
# CUPS printing. See also the cupsaddsmb(8) manpage in the
# cupsys-client package.
printing = cups
printcap name = cups
[printers]
comment = All Printers
browseable = no
path = /var/spool/samba
printable = yes
guest ok = yes
read only = yes
create mask = 0700

# Windows clients look for this share name as a source of downloadable
# printer drivers
[print$]
comment = Printer Drivers
path = /usr/share/cups/drivers
browseable = yes
read only = yes
guest ok = no
Exit nano with ctrl-x and y to save. Restart samba:
sudo /etc/init.d/samba restart
One last thing to change if your pi is connected via wifi, and that’s powersaving, if you don’t change this then AirPrint will drop off when the Pi goes into powersaving mode. Add this and save and exit:
# No power savingoptions 8192cu rtw_power_mgnt=0 rtw_enusbss=1 rtw_ips_mode=1
The very last thing to do is install Bonjour which is the Apple handover software:
sudo apt-get install avahi-discover
sudo /etc/init.d/avahi-daemon restart
And we are done!
To give it a test with an Apple device is pretty easy, hit the share button on any pdf or webpage, scroll down and find Print, it’ll bring up the below:

You might need to click select printer, and choose your printer. Click print, be patient for a few seconds and your printer should jump to life! Welcome to your new airprinter! You can view the print queue, print test pages etc back in the Cups admnistration, but thats all pretty straight forward.
If you’re like me, you can turn the printer off when not being uesd, but turn it back on when you want to print something and it’ll still be there, a really handy thing!