Welcome to Part two of my home automation/raspberry-pi blog posts.
If you missed setting up the headless Pi, here’s part one.
So I’ve got my Pi quite happily working away in headless mode, slimmed down installation and on the network. Time to put it to use!
The first thing I install is Pi-Hole. This enables network wide ad blocking via DNS. It’s superb, literally superb. Read up on it at https://pi-hole.net/. Here’s how to install it:
Open a terminal, ssh into your Pi.
ssh pi@192.168.0.24
Run the installer:
curl -L https://install.pi-hole.net | bash
The installer will ask for your password at somepoint, then load a graphical interface for your setup. Select both IPv4 and IPv6 ad blocking.
You can edit your static ip address here, if you didn’t in my previous blog post. Make a note of your password it presents you, although you can edit it later.
See if it’s working by entering the address in your web browser: 192.168.0.24/admin, enter the password you saved and you should be presented by something like below:

To enable pihole on your devices, go into the network settings tab on the wifi connection/Ethernet connection and add your pi ip/24 address into the dns tab. EG 192.168.0.24/24 in my case. Then that device will be ad free!
Time to move onto Home-Assistant and the exciting world of Home Automation!
It’s a piece of cake to install HA, just takes AGES!
Run in a SSH terminal:
wget -Nnv https://raw.githubusercontent.com/home-assistant/fabric-home-assistant/master/hass_rpi_installer.sh && bash hass_rpi_installer.sh
It will take roughly two hours to do this. Keep an eye on the terminal though as it’ll ask for your password half way through!
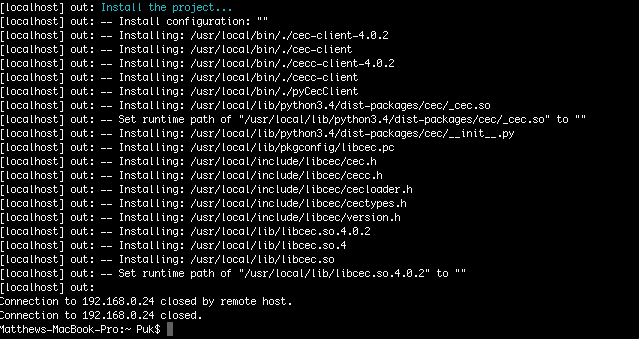
Once you’re presented with something that looks like below:

Then job’s a gooden! Type the address in your webbrowser and you’ll have something that looks like this:

So here we can see the installation is up and running! There’s nothing very exciting going on here right now, the install has auto-detected my chromecast and my TV as they’re both DLNA media players on the network.
So, this is where you now need to think what you want from Home-Assistant. I’ve got a Limitless-LED bridge v5, RGBWW E27 Lamp, and RGBW LED strip controller. I’ve also got a DHT22 temperature and humidity sensor that i’ve wired to my GPIO pins on my Pi. Using HA, I can control these lights via on/off, set coloured scenes, light temperatures, automate lights at times. I can check the temperature and humidity of the flat, and in future remotely operate the AC/Heating for the apartment. I want lights to come on in the morning for when I’m up early, and lights to come on in evening at sunset and change scene depending on what i’m doing in the apartment. I also want to monitor who’s home and whether any devices are on in the apartment to then automate those lights. HA is superb at doing all this, the community behind it is second to none.
So now my installation is running, I need to configure it. I’ll add the user Homeassistant (HA runs by a separate user on your Pi) to access the GPIO pins for my DHT22 sensor.
sudo adduser homeassistant gpio
All the configuration you need to do is in /home/homeassistant/.homeassistant/configuration.yaml
So to do this remotely, once again we use nano, in your SSH terminal:
sudo nano /home/homeassistant/.homeassistant/configuration.yaml
This will bring up the nano text editor and you’ll be able to edit the file. Have a browser through, most of the contents makes sense as you read through the text. I’ve commented most out using the # key.
My first thing to do is add limitlessled to the config, so i can configure my lights. Assuming you’ve already got the lights working with the mi-light phone app, this is very easy. Simply adding this text will make HA find the limitless-led bridge (i’ve already found the ip address from configuring the lights to work with the app).
light:
  platform: limitlessled
  bridges:
    - host: 192.168.0.25
      version: 5
      port: 8899
      groups:
      - number: 1
        type: rgbw
        name: Backlight
      - number: 2
        type: rgbw
        name: Lamp
I’ve also created some scenes:
############ SCENES ############

scene:
  - name: Morning
    entities:
         light.lamp:
             state: on
             brightness: 200
             rgb_color: [255, 255, 255]
  - name: Teal
    entities:
         light.backlight:
             state: on
             transition: 2
             brightness: 255
             rgb_color: [0, 251, 128]
         light.lamp:
             state: on
             transition: 2
             brightness: 255
             rgb_color: [0, 251, 128]
  - name: Default
    entities:
         light.lamp:
             state: on
             brightness: 255
             rgb_color: [255, 255, 255]
  - name: Normal
    entities:
         light.backlight:
             state: on
             transition: 2
             brightness: 255
             rgb_color: [255, 255, 238]
         light.lamp:
             state: on
             transition: 2
             brightness: 255
             rgb_color: [255, 255, 255]
  - name: Purple
    entities:
         light.backlight:
             state: on
             transition: 2
             brightness: 255
             rgb_color: [228, 151, 255]
         light.lamp:
             state: on
             transition: 2
             brightness: 255
             rgb_color: [228, 151, 255]
  - name: Green
    entities:
         light.backlight:
             state: on
             transition: 2
             brightness: 255
             rgb_color: [100, 246, 63]
         light.lamp:
             state: on
             transition: 2
             brightness: 255
             rgb_color: [100, 246, 63]
  - name: Red
    entities:
         light.backlight:
             state: on
             transition: 2
             brightness: 255
             rgb_color: [255, 48, 48]
         light.lamp:
             state: on
             transition: 2
             brightness: 255
             rgb_color: [255, 48, 48]
  - name: Game Mode
    entities:
         light.backlight:
             state: on
             transition: 2
             brightness: 255
             rgb_color: [255, 221, 211]
         light.lamp:
             state: on
             transition: 2
             brightness: 255
             rgb_color: [139, 143, 255]
And put them in a group, so the two lights are together and can be treated together:
######### GROUPS ########
group:
  Lighting:
    - light.backlight
    - light.lamp
Ctrl-x to save the document.
Restart Home-assistant after each edit of your config file with:
sudo systemctl restart home-assistant.service
So congrats on having a working HomeAssistant installation! Now follow to part two, installing Homebridge and using Siri to control my Limitless-LED lights.


